


 Select Store
 US
US
 UK
UK
Tuning Guide Blogs

Weymouth Venue Guide
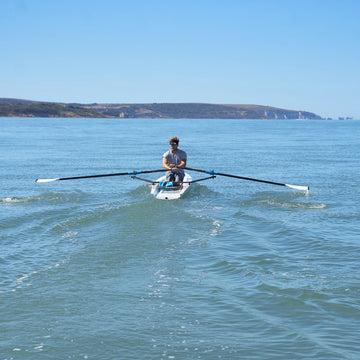
Blog written by Steve Cockerill, Rooster founder.
Photography: © Lotte Johnson
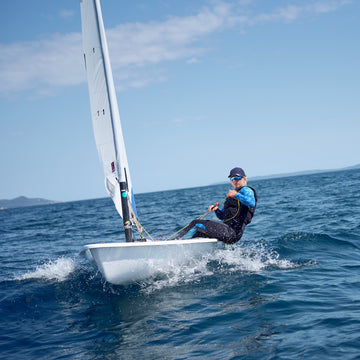
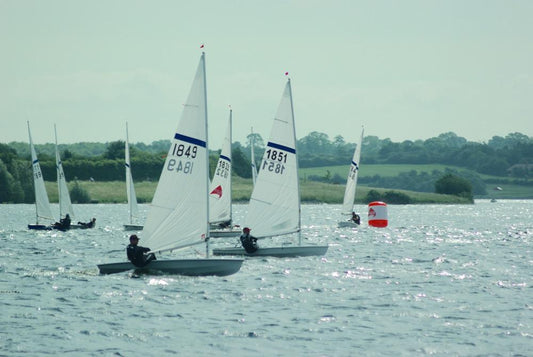
Although WPNSA at Weymouth can be a great venue to sail in Weymouth Bay, most of the Championships I have raced there, have been mostly been sailed inside the Harbour.
This has been true of the ILCA (Laser) Nationals, RS300 Nationals, 2000 Nationals and numerous qualification events over the years. The harbour is rather large and can often have more wind than the bay, but there are some quirks that you might want to take note of:
Wind from the:
North
If the wind is light, the wind can bend around the Nothe point giving a right-hander at the NW section of the bay. Likely to oscillate from the land so track the wind. It will be gusty.
East
Clean wind may move right on a sunny day (rare to get a SE sea breeze) but possible enhancement if easterly gradient might get waves/swell near entrances.
South East
Portland starts to play a role, the east side of the harbour will have cleaner wind than the right, wind shadow near the academy area, prominent wind bend around the Bill, left-hander at the top of the beat.
South
Wind will bend around the bill, depending on how south the breeze is the East side of the harbour will be very light and patchy best bet to go middle right and play the shifts.
South West
Compression effect and bend off the bill, top left always good, hard right never pays, you will steadily head off the line tack to take advantage of the shift on port to the mark, Keep on the bill side downwind.
Sea Breeze
This usually sets in around 210 and moves slowly right to 240 and can get fresh, bends as per the detail above.
West
Clean wind with pulses of breeze (rolling over the causeway) If in the northern part of the harbour you may get influence from the land to the north.
North West
Gusty and shifty as it rolls off Weymouth and the hills - eyes out of the boat for pressure.
Tide
This is negligible in the harbour, check the buoys in the area as you sail out but less than 3/4 kt (maximum near the gaps in the harbour wall).
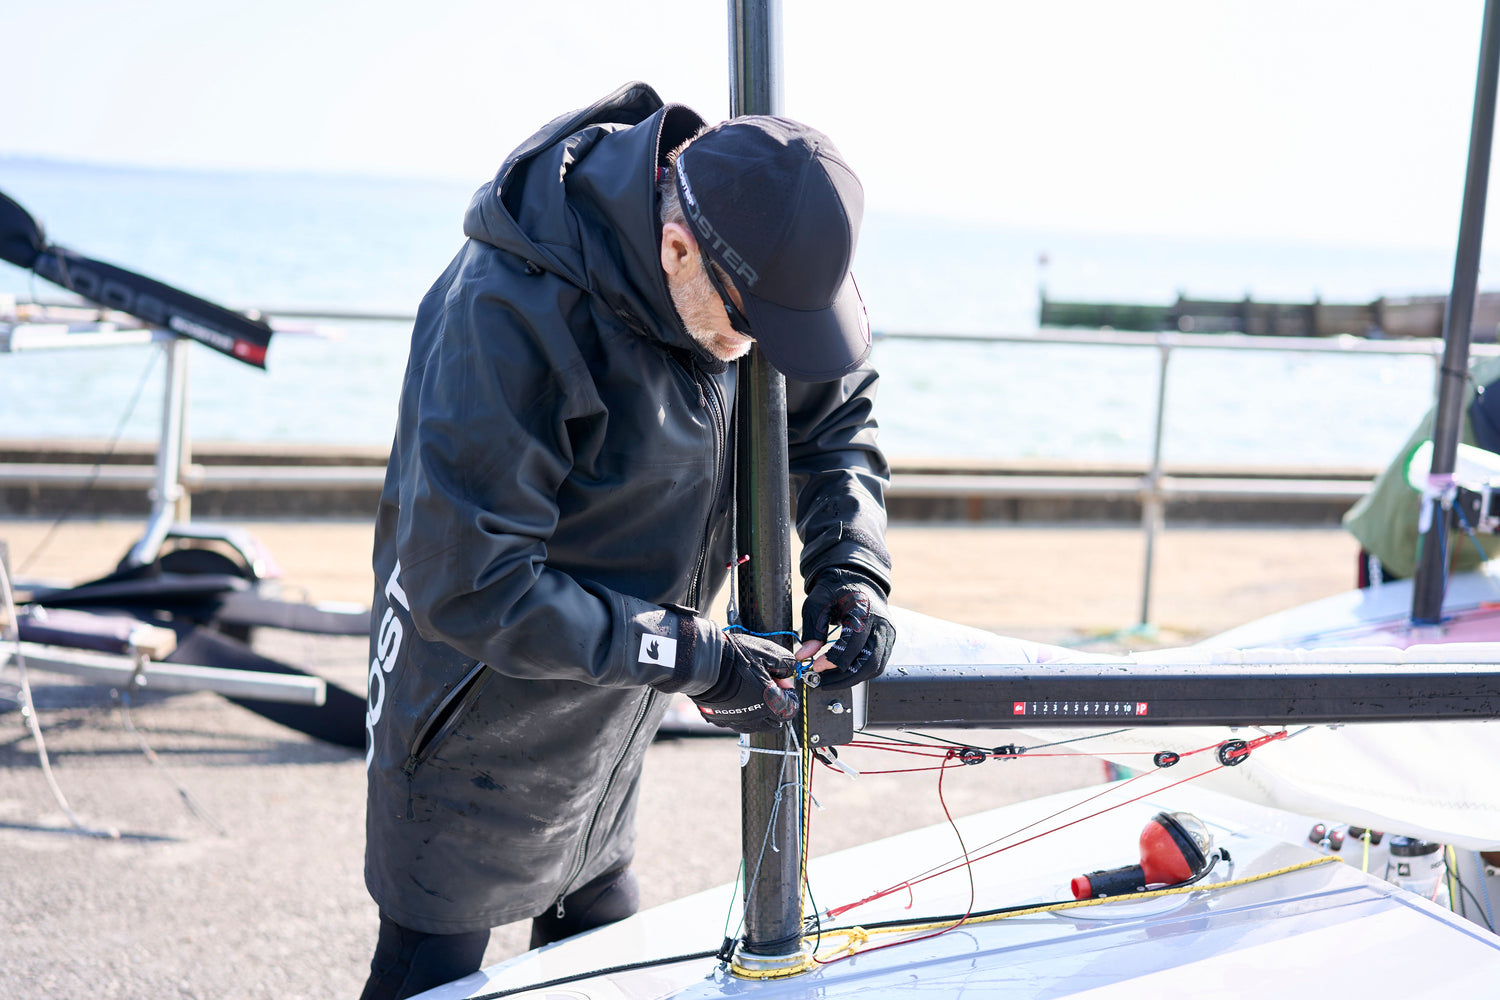
How to fit a typical dinghy sheave box into a spar
This a short article on how to cut a neat slot in your alloy mast or boom to fit a typical sheave box. This example is fitting a small 15mm diameter sheave block (from Ronstan) into a boom for the adjustment of the outboard end of a mainsail flattener.
Tools required:
Pencil.
Masking tape.
Ruler.
Vernier Callipers. (Optional)
Hand/Electric drill and bits.
A center punch.
A small metal file. (Flat or triangular).
A 'Dremel' tool and cutting disc attachment. (Optional)
Self tapping screws or pop rivets to fix the sheave box.
Duralac Anti Corrosive Compound.
A typical Sheave box e.g a..- RONSTAN RF15711.
or the Spinnaker 4mm sheave box from Super Spar PN 409
Procedure
First make sure you choose the correct fitting for the job, based on the control rope size, and expected load that will be used on the fitting - and the position of the fitting in the spar. As you will be cutting a slot in the spar, you need to keep the slot/hole to a minimum and locate the new fitting away from areas of possible high stress areas such as spreader brackets, gooseneck areas, kicker and mainsheet take off points for booms and the like. For a typical dinghy mast the front of the mast is normally one the strongest sections of the mast, especially in the alloy tapered section, where it will be welded, as this area will be thicker. For booms, the top and bottoms of the section are the strongest areas.
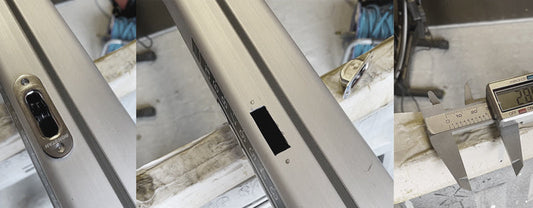
Measure carefully the cut-out dimension for the sheave box. Manufactures dimensions can be used - but have been known to the incorrect, so use a pair of Vernier callipers to measure the actual fitting. You could even make a small cardboard template first to test fit your new sheave box. In this case the dimensions are 28 x 9.5mm for the RONSTAN RF15711 sheave box.
Using masking tape affix this to the area where you wish to cut the slot, and mark with a pencil and with a small Engineering ruler and square, mark out the area to be cut out. Measure and recheck before any drilling or cutting….
Using a 4mm drill bit (depends of the fitting slot cut out size width), now carefully drill 4no.holes inside the measured-out rectangle. Use the metal centre punch to tap a light mark, so the drill bit does not wander when you start to drill the 4mm holes.
Now, if you have a Dremel tool you can cut down the sides to join up the 4 holes to remove the bulk of the metal. If you do not have this tool, then simply drill more holes down each side and then file down to create a neat rectangle slot.
Remove the masking tape, and now test fit the sheave fitting and mark the position for the affixing holes.
Now drill the holes for the screws or rivets. For self tapping screws you will need to drill the correct size hole by selecting the correct drill bit size for your self-tapper screws and then let the s/s self tapper cut a thread into the alloy material to tighten correctly.
Apply a smear of Duralac Anti Corrosive Compound to the base of the s/s sheave, the edges of the new slot, and the screws or rivets you are using.
Now screw in the self-tappers (or pop rivets with a suitable gun) to fix the sheave into the slot.
(Note : Just before you fix in the sheave box, you might wish to feed in the rope or line before final fix - or feed in a 'mouse' line...)
A guide to select the correct drill to match the gauge/number of self-tapping screw
Self Tapping Screw Size
Sheet Thickness (mm)
Guide Pilot Hole Size (mm)*
No. 4 (2.9mm)
0.45
2.21
0.91
2.31
No. 6 (3.5mm)
0.45
2.70
0.91
2.80
No. 8 (4.2mm)
0.71
3.00
0.91
3.08
1.22
3.20
1.62
3.40
No. 10 (4.8mm)
0.71
3.51
0.91
3.59
1.22
3.71
1.62
3.81
When using self-tapping screws, the chart above shows the suggested drill size that you should use to drill the pilot hole. As you can see, it is not an exact science, there is a range for each screw size.
Broadly speaking, the thicker the material that you are drilling, the more you should move towards the top end of the range when selecting the drill size.
So, all you need do now is feed through your rope or halyard line and go sailing.....!
A typical valley cleat fitting, using 2 no. Pozidrive self-tapping screws (no.10) to attach. Pilot hole used was a 3.5mm drill.
Europe Mast Thinking - The Danish Concept
When I was coaching the UK Europe Squad back in the late 90's, I had some technical help from Sid Howlett who at the time was Ben Ainslie's technical coach for the Finn. Sid explained that standard Finn mast bend profile was: The mast should have 100% of the fore/aft bend number at the half point (between the bands) with 50% at the quarter and 50% at the 3/4 point. Effectively a perfect segment of a large circle which makes fitting the sail to the mast very easy especially with increasing or decreasing sheet tension. We have to hope that the mast will bend uniformly with increased tension in your sheet - which if it has this bend profile means it probably will. The side bend profile was harder to describe. But Sid wanted 20% of the side bend 1/4 from the hull and 80% of the side bend at the 3/4 point - this measured with a tip weight. Now don't confuse the side bend numbers given by the mast manufacturer with the actual side bend as what we want is away from vertical and the mast is measured from tip to black band. Below decks - the mast should be super stiff sideways - and springy fore and aft. A springy fore and aft mast below decks might enable more gust response as the gust will attempt to open the leech - the spring would then allow the mast to vent aft , opening the leech whilst maintaining the correct mast bend between the bands, which is like an automatic raking system for breeze.
As the wind reduces then the mast recovers (springs forwards) again and the leech returns to the correct profile by itself. Too springy fore and aft and you struggle for leech tension when working the boat hard.
A below deck springy mast also helps to absorb over sheeting tension and makes up for under sheeted tension. Just imagine if the mast was a solid rod fore and aft - and the perfect leech tension was somewhere between one click on and one click off your ratchet block. That would be frustrating. The spring below decks allows the mast to self govern the power you take in the gusts.
The other conceivable advantage is that you might have to set up your rake slightly further forward to compensate for the spring - which adds to a more upright mast for downwind sailing.
Having said that, the bigger sailors are not looking for much gust compensation as they are keen to take the power. This early venting is great if we are sailing in waves as you want the rig to vent and recover on every wave. If you want to sail high on flat water, perhaps you are looking for less springy under the deck to give you a high power mode.
The Europe coaches at the time were guided by the Finn concept of mast bend. During the Olympics - many of the sailors had mis-interpreted the mast numbers given by the standard measurement system. They thought that a small number at 1/4 point from the bottom of the mast in the side bend graph meant stiffness - when actually it means flexibility. Think of it as the other half of the measurement away from the vertical as the number you see from the mast maker is not the offset from vertical - but a number that relates to how the mast bends relative to a line from the tip to the lower band. So bigger numbers sideways at the bottom mean that the mast has not bent at the bottom - so it's stiffer. This stiffer number gives more height to windward. This lesson was a hard one for many Olympic sailors and coaches as they also misinterpreted this number and struggled to hold their lane at the Olympics (or so it is rumoured).
"The Danish Concept is different":A concept that was largely started by Danish sailors was they wanted a mast that had the same fore aft bend numbers as the side numbers - so that the sail's luff curve would always fit downwind, even when the leech was open and twisted. This makes the masts more even in bend and less gust responsive in the top compared to the Finn concept masts which have much more sideways bend at the 3/4 point. However, the sails for the Danish concept tend to be slightly flatter in the head allowing for less vang tension downwind. The boat is easier to handle downwind in breeze as the mast tip does not bend as much towards the bow and the boom is less close to the water due to the less vang required.
I was very much interested in this concept, especially when UK Sails took the first three places at the 2020 Danish Europe Nationals Championships. My experience of bendy tip masts (the Finn concept) was that they caused sticky conditions in the light as the sails caused too much hooking (as it was made to compensate for increasing sideways bend in stronger breezes). Unless you used two sails - one for light with less return in the leech and one for windy that was cut for the increased sideways mast bend. So the Finn style bend profile tends to use multi changes of sail throughout the conditions to make the optimum speed. This would certainly mess with my head so I was happy to use the Danish concept and stick with a one mast, one sail setup with a Danish UK Sail.

RS400 Wing Wangs – What's under the bonnet?
It was time to change my Wing Wang Primary Lines on my RS400 and I had noticed that the wing wangs on my club boat were far easier than my race boat. There were three differences:
The blocks on the club boat were 40mm Harken and on the race boat, 29mm Harken.
The launch line on the club boat was under the Wing Wang Primaries. And the primary lines were much smoother than on the race boat. So I set about copying the club boat set up, made up a pair of primary lines that can be cow spliced onto the 40mm Harken Blocks, available from Rooster – if you are not keen on splicing. There was no need to change the Halitec RS400 Wing Wang control lines were the same on both boats and were far from worn out.
See the below video:

Rigging an Old Style Laser 6:1 Kicker
(Previous Rooster Blog article from Oct 2015 - updated and restored)
For those of us who have been using the new 15:1 kicker for sometime - we may perhaps think that everyone has one. Well interestingly, a Gold medal was won using the old style system in recent 15:1 history.
Robert Scheidt I am sure was not restricted by a club rule that many of our clubs sailors have instigated - the less than £300 a boat rule. Well in case you have forgotten - or perhaps you fancy being a purist and are looking for a few grams of weight saving - here is our information sheet on how it should be done, together with the items you will need.
Attach the first micro ball bearing block such as a Harken 16mm air block or the Ronstan RF20101 to the bottom of the top block using a loop of Rooster Spectwelve or a shackle (I suggest a 5mm sail shackle as you can tighten it with a flat blade screwdriver..). Attach the other micro block to the end of the 6mm main line (suggest the 6mm Rooster AllSpecPro) and feed over the top roller of the top block . Next pass the main line through the top roller on the bottom jammer; and then back through the top hanging block.
Bottom Block then
..then through the block attached to the key block.
Now the 3:1 part of the kicker needs to be fixed in order to enable us to make the unit 6:1 using only one line. This is essentially a neat knot around the bottom jammer block. Start by passing the tail of the line through the bottom hole in the cheek of the jammer.
Pass the tail around and behind the line to start the locking action (when under load the tension secures the line). Next you need to replicate this on the other cheek of the block.
Pass the rope around to the other side, and execute the previous move in reverse. Start by passing the line in between the cheeks and exit through the free hole in the side cheek.
Ensure that as the rope tail comes out from the cheek you use it to lock the 'round the block' part of the line.
From this point adjustments to the length of the kicker (max off position is when the block is at the top of the key block) are easily made:
Now with the 3:1 locked, take the free tail of the line and pass it through the micro block at the top of the kicker...
...then down to the jammer...
...around the pulley and then OUT!
Check the overall length of the kicker. We measure from the top of the Kicker Key to the pin on the swivel/base and set all our vangs at 63cm. This should be a basic setting that can be tensioned or loosened for windy and light settings. Note that the 63cm is the maximum off it should be able to go off - at this point, the little block is at the top of the key block.
Now that the length is set you can start a rope handle. We do this by making a quick release loop, and then passing another loop through it and continue till you have 10 - 12 inches of handle, making sure not to let the tail through the loops till your finished. To finish and secure the handle off pull the rope tail through the last loop.
Finish the handle by tying a bowline to make a loop. You should now have just enough tail left to tie to the centreboard handle - making the control line much easier to find when on the water.
RS Aero Over Deck Control Lines - Full Video
POST VIDEO NOTE:Please use a separate piece of line to attach the two blocks to the traveller eye. see image below:
This is to stop any chance of the two blocks and their 3mm elastic from tensioning the traveller in any way. This was required by measurement at the 2018 World Championships.
The story:
During the recent RS Aero World Championships, it also became apparent that if I wanted to release the controls downwind efficiently that I would need to change the control lines to over deck take up style. The old style tended to get a little tangled downwind:
I was inspired by Steve Norbury’s version that I had seen at the Aero Southern Championships which I knew was class legal. Obviously, I have put some of my splicing experience into the kit to fasten the two Ronstan Shock Blocks in place and used Rooster’s EasySplice™ Continuous Control Line as it’s just so easy! I used the Ronstan Shock Blocks as they can be colour co-ordinated and are very light – which I guess is nice as the boat is so nice and light. I also used Selden 30mm Loop Top Blocks for the take ups in the video and have recently changed them to Allen 30mm Blocks .
Rooster has produced a kit with most of the splicing done, all you will have to do is ‘cow splice’ the Ronstan Shock Blocks onto a pre-made double loop 180mm line under the deck.
We suggest you use 2mm Spectwelve (an SK78 12 braided Dynema) for the take-up tidies and Rooster 4mm Zero a super low stretch UHMPE 12 braided line for the traveller. You will also notice that I have adopted the Rooster colours which have been used extensively in singlehanded sailing with blue for downhaul/ Cunningham, grey for outhaul and red for kicker or vang. Feel free to take the parts and ropes in the colours you are used to.
I used 5m of EasySplice™ for the outhaul system, although I did not have much line to spare so perhaps it’s worth taking 6m and losing a bit. Our kit is now 5.5m so you will need to first ensure your outhaul is maximum off.
Then join the outhaul when it can just go in front of the centreboard case with a little movement.
For the downhaul, I used 8m of EasySplice™plus 1m of 2mm Spectwelve for the two side deck tidy’s and 1m of 4mm Zero for the traveller.
Tools:I like my tools so I tend to try and use them all. But if you are keen to do the whole thing yourself then you will need:
Serrated Scissors
2/3mm Pull Fid
4mm Push fid
Rooster EasySplice™ Needle Fid (I use the super thin needle for the EasySplice™ Control Line splice).
Needles and Waxed Whipping Twine (available on the Rooster website to finish off the joins in the control line.)
If you purchase the kit, then you will only need the EasySplice™ Needle Fid, twine and needle, although I am sure you would still find the Serrated Scissors useful.
Splicing TipWhen you cut the centre core out of easy splice, leave it as loose as possible. This will enable the other line to pass into it easier. Do not try and milk it to make it smaller as this will make it harder to pull the other end through it.
RS Sailing is the most forward-looking company I have ever been close to. I understand that they will be stocking these ‘Rooster’ upgrade kits in due course. I think it will make a significant difference to your Aero sailing enjoyment – if it could get any better!

Laser - My Mast Rake.
So Lasers are one design? Well almost. There are build tolerances that make small differences to your speed from mast rake, spar stiffness and weight. Also having sailed a Europe dinghy very seriously, I also know the effect of mast rake on performance. In light winds, Europe sailors used to rake aft so that the sail kissed the aft deck with just the right amount of leach tension. Then they moved the mast forward for maximum leach tension as the wind increased. Then - well then if you had a bendy mast - further forward still to hold the leach - or if you had a stiff mast, further back to open the leach. The key consideration for the Europe was to keep the boom as close to the aft deck as possible. Europe and Finn sailors talk about edge effect, where the sail and deck can work together, but certainly from my experience in Laser Standard and Laser Radial sailing, the sooner I was able (when saying able - I mean using the sail controls to give best sail shape - but still the word is able) to get the main block to block, the quicker I was in the lighter conditions. I have sailed Lasers with the rake too far forward - It was slow in light winds, I tended to over bend the upper mast to get the boom to block to block. The boat would pitch or bob upwind in waves. Strangely with the mast too far forward, I also found the weather helm increase? That might sound strange but if you tighten the leech more and suck the fullness out of the luff - then the boat will feel heavier on the helm. To mitigate this, I would select a bendy lower mast (how to find a bendy one? ANS: weigh it or take some callipers to the section. Thicker wall or larger section = stiffer) My first laser had a very aft rake (3795mm). I won a few races at my first Standard Europeans and came 3rd in my first Laser Nationals in 1993 - I was a rocket ship in light to moderate winds - but pretty rubbish in a breeze - but that might have been me.. From my Europe dinghy experience, we used to push the mast forward for flat water and aft for wave sailing. Although we can't adjust our mast rake on the Laser - we at least can be aware of its rake and how to mitigate its rake with the spars that we have to choose from. So let's see how you could measure the mast rake on a Laser, then discuss the relative merits of some extremes, and by that I mean extremes as the builders are normally very good at keeping within a cm of what we would call a good mast rake.
To measure your mast rake you will need to attach a tape measure to the top of your standard lower mast (I use electrical pvc tape).
Sorry if you are a radial sailor, you will have to borrow a standard mast. Make sure the lower mast is straight. Put the mast in the boat and then take the tape measure to the back of the boat - making sure the tape is not twisted and has a good lie to the transom. Where the tape kisses the back deck is where you measure your rake number.
This one reads 3m 82cm - or if you are technical - it reads 3820mm. Give or take a couple of mm. In fact my tape measure is probably a couple of mm proud of the top of the mast so its perhaps really 3818mm. Good mast rakes: This depends on the version of Laser you are sailing: 4.7. After seeing the variance in lower mast bends (they should be 15 degrees) its perhaps hard to call this one. But if you have lots of lower mast bend - then more upright (less rake) or larger number might be better. Do check your lower mast bend though. If you have a section with lots of bend, you might want to change it if you are planning to sail in all conditions. It should be 15 degrees, my feeling is that less bend will give you more power in the light to moderate and too much power in the breeze. Radial. The problem with the radial is all the spars are stressed to (or even beyond) their elastic limit. Too upright (larger number) and the spars bend permanently, too raked (small number) and you have no leach tension. Spars have changed significantly. Lower masts can be bendy or stiff. Personally I prefer the lower mast to be on the bendy side and the upper mast to be about 2.85Kg. I find that when the upper mast gets too stiff, then the leach looses contact with the wind. I like a mast rake of about 3820mm - so I am pretty happy with this new ship. Standard sailors tend to like stiff upper masts. As a rather short 5'8" standard sailor I used to select lower masts that were rather bendy so I could vang on hard in the breeze. My first standard laser had a rake of 3795mm, which was great in the light but not competitive in medium or strong winds. Much more than 3830 and I feel that I could not get the boom block to block. Again - this depends on the spars you have to choose from. A very bendy lower mast might be ideal with a 3830 mast rake - but you would also need a very stiff upper mast to maintain the upper mast sail profile. I think 3835mm is a bit uncomfortable to sail a radial - as the weather helm gets hard and my biceps start screaming. Its also pretty hard to get to block to block. My charter boat at the Laser Worlds in Terrigal had a mast rake that was 3860mm. It was a pig. There was no fullness or power in the upper leach and the wind appeared to not stick to the sail through the wave pattern. This boat did not have a great pedigree. The Standard sailor who had podiumed at the Olympics the previous year, did not make the top 50 of these worlds. If you are going to get choosy about the mast rake, you have to know what spars are available. Aussie boats were traditionally further forward than European boats - but they also had super bendy standard lower masts and stiff upper masts - which gave them a further forward mast for going downwind and a more even curve over the two spars. Put UK spars on an Aussie boat (Aussie boats had a mast rake of 3830mm) and you have way too much upper mast bend which sucks the power out of the luff and opens the leach. The softer lower mast allows the upper mast to stay relatively powerful and hold its depth. I think that LP have achieved a great standard in mast rake at the moment with some super stiff upper masts for Standard sailors. As a radial sailor, I think I am looking for a more bendy upper mast than a standard sailor and as bendy a lower mast that I can find. Next job - fit a Rooster Pro Plus Laser Toestrap and Toestrap Adjustment Pack, New Rules. Then.. time to test the new ship for real....

2000 Tuning Guide
2000 - an easy boat to sail, a hard boat to sail fast!
This blog aims to pass on the tips and lessons learned whilst trying, and finally winning, a 2000 National Championships.
If I have not bored you with the story of why Sarah and I became 2000 sailors, let me do it again. Sarah had ruptured her achilles whilst running for a trolley on the slipway at Rutland - watch out for the change of slipway width! When she had finally come out of the incline boot, the 2000 seemed to be a nice and safe environment to get back on the water. If you had asked me if I thought the 2000 fleet was tough and the boat was nice to sail before I had sailed one, the answer would probably have been no. I was wrong on both counts. The boat is comfortable and pleasing to sail well and the fleet has some very talented sailors.
The Nationals this year were in North Berwick hosted by East Lothian Yacht Club, and it fitted with the many other plans this year. I had sailed the Solo Nationals at North Berwick and we had found it to be super welcoming so we had it planned very early in the calendar. The evening walks were definitely worth the drive.
East Lothian Yacht Club excelled themselves again with a terrific team to ensure the event was the #bestregattaever! The race officer was excellent, a real seat of the pants sailor who could weigh up the tactics of the first beat to tease the sailors into some head scratching.
But the reason for this post is not to sell you why East Lothian Yacht Club is the best regatta site ever, but to pass on some of our 2000 racing tips whilst they are still in my head.
The most applicable phrase about 2000 sailing is that it is an easy boat to sail, but a hard boat to sail fast. We finally got it sorted and won the Championships, but it was never easy.
2000's can get exciting. Photo by Eric Robertson
The lessons learned along the way:
Never sit too far back downwind unless it's so windy you shouldn't really be racing. Some fast crews really do not leave the shroud. I know that is counter to normal sailing principles, perhaps it's because the hull is largely flat with a small kick up at the transom, so keeping forward uses the flat area to promote planing
Tackline of the gennaker can by eased out in light winds by as much as 5 inches. Then heel the boat to windward to bring it from behind the mainsail. You might like an adjustment on this line, tightening it as it gets windy
Gennaker head can be eased out by as much as 5 inches in light winds and perhaps as little as 2 inches in strong winds. The gennaker is rather small so the further away from the rig it can get the better
Centreboard should be able to go nearly flush with the top of the case. Replace the thick rope on the handle with some thin rope so you can achieve this. Do not push the board lower as this may damage the case. The science behind this is that the rig has been thrown over the bow of the boat to help speed up the downwind performance, so the centreboard then needs to move forward to promote some weather helm to help encourage you to keep the boat flat. No weather helm and you can be happy sailing heeled over, but that is very slow
Downwind in light winds sit as far forward as you can and try to promote some windward heel. Ease the kite to allow the now eased tack and head to help the kite to float out from behind the mainsail and soak (nearly running) as much as possible. You can also pull the centreboard up too as long as you are far enough forward as the centre of effort of the boat will move forwards with your weight allowing you to pull the board up almost completely. In this situation the helm is the balance. I actually found it hard to keep the windward chine in the water and was asking Sarah to sit more away from the mast. I was on the centre line which felt quick
Always use the jib on the most aft car position
The mast rake of 6570mm worked for me, measured from the top of the aft top gudgeon but with a shroud tension of just 150lbs. See my notes below on mast set up
Mast set up.
There are three schools of thought on the mast set up in the fleet. My set up was based on Jasper Barnham's set up for the mast, apparently he was a Firefly sailor which makes sense. To add some extra downwind pace we raked further forward, my spreaders were out and forward from neutral position. I had to use the mainsheet to keep the jib luff tight upwind and was not worried when I had to ease the mainsheet and add kicker to keep the boat flat. We were using the old Holt Allen mast.
Simon Horsfield set up; Selden mast, spreaders neutral so he can use more rig tension, but pushed out for more power.
Richard Hudson set up; Selden mast, no deflection on spreaders, neutral both fore and aft and out. The advantage of this set up is that you can use lots of rig tension and still get gust response.
Despite our three very different set ups we were all fairly similar speeds in the moderate winds.
Modifications to keep the crew happy.
Change the toe straps
A pair of adjustable Selden Auto Ratchets - do adjust the tension they work at with the small Allen key, they are surprisingly light and work a treat One of the best Selden products
Fit Harken 150 Aluminium Cleats on the jib sheet
Consider fitting a 2:1 jib sheet for windy weather
Fit a 6mm All spec pro Gennaker Sheet - you can take the centre core out in the middle to make a nice smooth loop to pass the Gennaker sheet around the forestay. Check out how to do a centre taper on All Spec Pro here, 9m should do it.
The centre taper is passed through the clew - the sheet is then passed through the loop to make a tidy smooth clew knot.
It looks like our 2000 is now sold. We are not sure if that chapter is closed for good as we do have access to another one should we be keen to come and play in the future, but for now we are going to put the time into the RS 800 and the RS Aeros, although a snowy weekend in January might change our minds as the 2000 is a warm dry boat with plenty of storage for hot drinks!
I hope you enjoyed the tips and can add more of your own in the comments below. I am sure the class is going to go from strength to strength. Kev O'Brian is your new chairman and is open to new ideas to promote class membership and participation. The committee are keen to promote the training aspect of the class and Simon Horsefield has already been starting to give some excellent coaching tips each morning this year. Keep up the good work guys, I am sure we will be back soon.
We are already planning to come back to East Lothian again for the RS Aero Nationals in 2019. We are certainly looking forward to seeing some friendly faces #bestregattaever!
Cover photo by Eric Robertson
Save Save
Streaker Tuning Guide
After Winning the Streaker National Championships 5 times, 4 of which with a Rooster OD Streaker Sail, I am often asked for a tuning guide - so here it is: In the Streaker we have a rig that is a halfway house between an un stayed rig and a stayed rig with spreaders. With no spreaders to deflect or control the mast, the mast bend will depend on your settings of shroud and forestay and how much you are going to let the deck support your mast. I like to set up the rig so that the boom is parallel if not closing on the aft deck when sailing to windward in 12 knots with lots of sheet or vang tension. You should also note that your mast will behave differently when you are hanging out over the side of the boat in maximum power conditions, when compared to someone 3 stone heavier. If you are lighter then you will need a more forgiving set up to allow your mast to yield and give you acceleration. So I rarely share numbers to un-stayed rig sailors, instead I offer the following tips: Less than 5 knots. Beating. There is no difference in the set up here whether you are light, heavy, fit or unfit; unless you are expecting the wind to increase through the race. Primarily you will need to take out the bag of the sail near the mast - sail makers call this luff curve which is very useful when the wind gets up some more. But now in these drifter conditions, going to windward, this early bag in the sail shape is not desirable. Sheeting hard to take out the luff curve or sail cloth near the mast will hook the leach which is also not desirable. Ideally we would like to sheet with relatively light tension, paying particular attention to the top tell tail. Try to keep it just flying. But we still have the excess luff curve to manage.
Managing the luff curve: 1. Pull on the outhaul - this sucks a little luff curve out of the sail. 2. Release the in-haul of the sail which can fool the sail that there is lots of low down mast bend - which again reduces the excess luff curve situation and allows you to get the wind to stick to the sail early on its journey across the sail. 3. Over release the Cunningham tension - or even halyard tension and encourage some small horizontal creases I your sail. This will help you take the draft aft (this is the reverse of Cunningham which pulls the draft forward) 4. If you are sure that the conditions will not change - you might consider easing the forestay which will allow the mast to bend more with the weight of the sail. However, if the wind increases by 5 knots you might regret this as you would quickly run out of power and luff curve.
8-12 Knots - Beating
My basic rule is sail in 12 knots of breeze - if you are struggling for power and pointing ability - pull on the forestay tension - if you have too much power - then let the forestay off a bit.
Now - in the higher gusts you can start to really work the wind - and suck out plenty of power using your leach. I use relatively tight forestay and slack shrouds. I use main sheet tension to gain the most power from the rig - as using the vang (often used by sailors to help take out the luff curve) unfortunately depowers the mast as it pushes the boom into the mast. This wind strength is often the transition between vang sheeting (if you have too much luff curve to remove with normal cheats above) and mainsheet sheeting which develops lots of power in the rig. A constant eye on the leach tell tails to ensure they are still breathing in the gusts whilst also being aware that too much tension can over flatten the sail and stall the tell tails. Constant sheet tension changing is required. 12 knots to 15 knots - Beating
Note: Ian Jones leeward shroud tension.
Depending on your mass and your fitness levels - this area can be very different in set up. In these conditions it is normal for the wind to start to drag the fullness in the sail aft - causing heel and loss of speed. Those with a fitness or mass advantage are trying to keep the draft 35% back from the mast - without resorting to using Cunningham (as this also opens the upper leach which depowers the rig) So heavier sailors will support the mast by using more forestay tension (this reverse bends the mast at deck level and thrusts more fullness towards the mast). Lighter sailors will be happy to let the mast bend (sucking out fullness and sending the darft aft) which allows them to use more Cunningham tension to pull the fullness back to the mast - and in turn re establish the balance of the boat. In these conditions I might start to use vang to hold an average power - but over sheet with the mainsheet when I need extra power and leach closure. If you use vang, it will tend to pull the draft aft - so be prepared to use either more Cunningham or more inhaul to balance the low down mast bend. I use very slack shrouds on the Streaker. This has caused some consternation from many who consider themselves experts in the class. This set up means that I can run very deep downwind but it also gives me speed rather than height to windward. Running slack shrouds does encourage the leach to open as the mast bends sideways upwind. For those lighter weight sailors, this is a great set up for you. I compensate for the sideways mast bend by using lots of mainsheet tension to close the leach which gives me back the height. Personally I prefer the way the mast moves around with slack shrouds. 16-30 Knots Beating
Rig Set up in 12 - 15 Knots. (note closing on the aft deck) Mainsheet tension to help maintain height with some vang tension that holds the leach if I ease the sheet.
Easy sailing - Lots of Vang and lots of Cunningham . The rig becomes a puppy - sheet loads reduce and she becomes a joy to sail. Don't pinch to depower, instead - ease the sail for speed and keep the boat flat. You will not achieve a flat boat by hiking alone - you MUST ease the sail - even if it flaps. 16-20 Knots Downwind: Remove the vang and the Cunningham for a fuller sail, but watch out for death rolls if you let the vang go to much - unless you like sailing by the lee. Check out the Rooster Boat Whisperer Downwind DVD for some standard corrective measures not listed in any books. I am sure that this so called tuning guide has sparked off more questions than answers. Everything else will follow if you use the rules and cheats above. I am always happy to help or advise so please feel free to either call me at Rooster HQ or comment below. Happy Sailing Steve Cockerill
Re Rigging a Spinnaker Halyard on a Feva
After two years of racing our RS Feva some parts have worn out and we are suffering with more breakages.
With the Worlds coming up this summer we have been making sure our Feva is ready to go and will not break down during the event. Recently, at the Itchenor Schools week, we had problems with our Gennaker. We soon realised one of the problems was that our halyard was twisting and kinking, so it was not running very smoothly and, after we took the foredeck apart, we found out that many of the blocks were worn out.
Over the week we went out and bought four high quality ball bearing blocks and a new Gennaker Pole. Steve Cockerill kindly gave us a new Rooster Spinfast Gennaker halyard. We chose this halyard as it is does not twist or kink.
We got together all our tools which included three different sized allen keys, one Philips screwdriver and a knife. We started off by taking the fore deck off and unscrewing all the blocks and getting rid of them whilst keeping the springs to hold the new blocks up. We then cleaned out the foredeck and left it to dry. One hour later we came back and screwed in all the new blocks with a touch of sika-flex to make sure they are secure. Then we threaded the new pole in and rigged the new halyard and re-attached the fore-deck.
We decided to put the mast up and test it all out with our new spinnaker, it all worked smoothly and ran the best it has ever before which was very satisfying for Jamie. After flying the kite we thought the halyard was too long as there was a risk of it getting caught under the pole, so we measured how far the halyard would need to come out in light winds when the gennaker is fully let out. We cut around a metre off which meant we had a 13 metre halyard. (Note Rooster Feva Spinfast Spinnaker Halyards now measure 13.5m)
We are looking forward to testing it out on the water on Saturday and are really excited to go to Spain for the RS Feva Worlds.
Remove all the bolts and screws and store them safe.
A very worn block
Remove all the blocks
Screw in all the blocks with a touch of sika-flex
Attach the halyard making sure it is rigged right
We take our halyard all the way to the back so if Jamie is sorting out a problem I can still drop the kite.
Double check the halyard is rigged right and then screw on the foredeck making sure it is secure.
Rig the mast and check the system works by rigging the kite and doing a few hoist and drops.
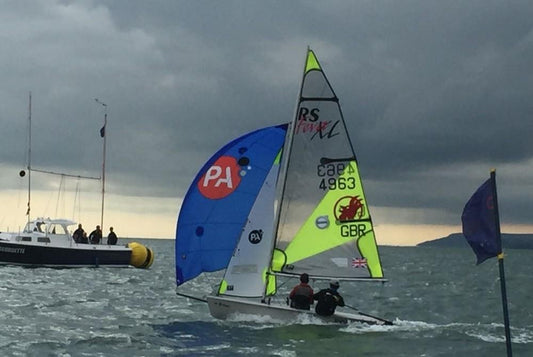
Feva 4963 Louis Wright and Jamie Allen

RS400 Tuning Guide
Reflections of the 1st Season in the RS400
So our first season of the RS400 is almost over. We had never looked at an RS400 as an option for us as we considered ourselves to be too small. At 143Kg (22.5 stone) we thought we fell between the RS200 and the RS400. Encouraged by the size of Stewart & Sarah Robertson at the Endeavor Trophy, we sold our Aeros and turned them into a nice shiny new RS400. Reading the 'tuning guides' I was reassured that some teams were in our weight range. I did my best to set up the boat with the lighter crew weights and found it quite a handful upwind. It was not until we raced at the Draycote Sailjuice where we discovered that RS400 sailors measure their spreaders from the track - not the mast wall. So we had been sailing with seriously long spreaders in the region of 415mm (a heavyweight set up) when I thought I was on 395mm. I recall that we were a bit high but slow upwind which we compensated by easing the rig tension, but really quick downwind. I am still encouraged to try longer spreaders again. We were also racing at Chichester Yacht Club's winter series against some very competitive Merlins with some success; perhaps we were suited to this boat - at least in the confines of Birdham Pool (Chichester Yacht Club's sailing area). We also raced at the Bloody Mary and found the low fast route upwind of Mark Oakey was impressive. We eventually changed our set up for shorter 395mm spreaders. Whenever we raced in light winds, we were fast. The Chew Valley Open meeting was a case in point. It was about this time that I experienced with packing the front of the rudder stock to give me more feel. This gave me the confidence to sail the boat upright as I had some decent feel on the rudder. In the light winds on Saturday, we won both races - then got a lesson in upwind and downwind sailing on the Sunday in big breezes. Reflecting back - we felt we had pace upwind, but none at all downwind. I resolved to put the spreaders out to 405mm. We shared some tips and experiences of the Warsash Open on the blog at the time. Our wing wangs were startig to wear out, so after investigation, I realized that they had been too short, so our pole was not projecting/angling wide as the passive handle was tight against the cleat. Was this the new downwind magic speed ingredient I changed the rope for Halitec (its Technora/polyester outer is super hard-wearing and its SK78 inner core is a super low stretch) and checked that the passive line was not restricting the active. The Southern Championships were light winds - which boded well for us lightweights. However, we had sold our sails the weekend before and I had not checked the new set. Wow, the mainsail looked very different - (not really - I had just not adjusted the batten tension) They were very flat as the battens had not been tensioned. We were on the pace but lacked a little height. I put it down to the batten tension - and added considerable tension to all the pockets after we had finished. We tested our new batten tension at the Burghfield Open. We had pace all round the course, but it was light winds and the twist we set up with our shorter spreaders might have helped. We wanted to test our rake-ing regime throughout the wind range. I hear many who are sailing with a very upright rig - they quote 7m odd in light winds. We, however, had settled on 6m 96cm as our most upright in light winds. I could not find a definitive mast rake method when chatting to the RS400 sailors in Garda - so here is my method: Firstly I test my tape measure is in the correct position on the mast. I check it reads 80cm on the top of the gooseneck. and then measure to the top of the GRP of the rudder gantry. We leave 5 threads on our mast ram - never move it and drop one-half hole for moderate and one-half hole more for dogs off chains. I measure 28 on a new loos gauge.
Don't forget to rotate your plastic parts of the loose gauge. As they wear out, they under-read. I have marked the worn parts of my wheels (with a black pen).
Bass Week, photo by Peter Mackin
We went to Bass Week to test our Rake-ing regime. It was typically windy. We were happy with our one pin down rake in most conditions. So our rake was more like 6m 93cm for most of the week. The conditions were testing with some general handicap style reaches which Mark Sommerville and Joe Roberts relished. Once home in the sunny south, I had the time to test the trueness on my rig.
Centerline check
You might find it hard to see but the line is black and runs up the mast. I am holding it with my other hand.
I took a line from the bow to the transom - and also held up a thin line from the upper gudgeon to spy if the mast was upright. The jaws of my boat needed to be re-trimmed - I used some old sail battens - one from my Dad's old Merlin - which gave me a tinge of nostalgia. Some other important tips: Please change your main halyard attachment to the top of your masthead (only works on newer masts) Be aware that the crane itself damages the main halyard. Even Halitec's Technora/Polyester mix can be cut by the sharp edge of the sidewalls of the crane. Rigging - my first method of setting the shrouds was now perhaps comical. I would wind the mast ram back to enable me to attach the shrouds and then fight the mast ram back to its place again with the shrouds under tension. After chatting to the A team at Garda - there is a much simpler way. Release the jib tension and leave the mast ram well alone - and then lean on the main halyard. (you can even do it on your own if someone is holding the camera)
The next big lesson we learned early on. The spreaders are measured from the mast track - not the sidewall or are they. I heard many different stories over the season. Out set up was: 405mm spreader length and 140mm deflection (we are 143Kg ). However, we have added just another half a hole on the spreader width - so now about 410mm. This gives us slightly more offwind speed but we do have to rake a little sooner.
Don't be put off sailing an RS400 if you are 140kg combined. The rig is very adaptable, the boat is a dream to sail and the fleet is competitive and friendly. Sarah thinks that it is a great boat for girl crews. :-) These settings are not definitive - I am thinking now of pushing the spreaders out a little more to gain some downwind speed and a little more height upwind... however, a 3rd at the UK and Irish Nationals would suggest we are pretty nearly there or are we? A windy week would have produced a very different result. The rope used on the RS400: Spinfast (4mm) - Spinnaker Halyard Jib Sheet (7mm black) and Main Sheet (8mm) Polilite Spinnaker Sheets - 6mm AllSpecPro (red/white) Halitec - main halyard (21m)

Graduate Tuning - Strong Winds (with some good technique tips for all 2 sail classes)
Some great images and videos here for anyone planning to race hard in strong winds in a Graduate. - Over 20 knots.
This quick guide should help you prepare for some strong breezes in future. If you are not a Graduate sailor - there is still some great tips.
On Shore Preparation: Sails prepared to counter the draft being pushed aft by the wind:
©Nigel Denchfield/ Stewartby Water Sailing Club
Jib Cunningham: (See image above) This is a more powerful control than you might imagine. Pull it on hard on the shore after you have applied your rig tension (My rig tension in this shot was 29 on my loose gauge on the shrouds with 3mm wire) which equates to about 400 lbs tension.) The tension pulled on the jib Cunningham should not only take out the wrinkles- but also make the jib lift slightly at the luff in normal conditions. It will look great once it has 20 knots over it, even if it is made with the heaviest of yarn tempering such as is used on our new Rooster OD Tri Radial Graduate Jib.
Main Cunningham: I pulled about as hard as I could on the Cunningham even with its 4:1 purchase which again moves the draft forward to both compensate for the wind pulling it aft but also to enable me to use lots of vang to flatten and depower the mainsail.
Centreboard position: In strong winds there is a high chance that despite all efforts that weather helm might take control - so I might not be quite so excited about getting the board all the way down - I might be happy with it a couple of inches up - but continue to monitor the feel on the helm when the boat is upright - or least when it feels upright.
Jib Cars: I moved the jib cars one hole aft from their maximum power position. I might have gone further, but we were never sheeting the jib in hard - so the leach would rarely hook.
Technique:
Crew Jib Technique: Attempting to control the power with the rudder is not fast, does not feel safe or inspire confidence. Boats should be trimmed with the mainsail, and then when the gust is too much for an ease of the mainsail, then crew will also need to ease or dump the jib. However, the helm will also have to note that they must not sail to the jib tell tails when it is eased. Simply hold the same line as before and allow the luff of the jib to lift and let the power out of the slot with the jib eased. You can see in the picture that my jib tell tales are lifting - but the boat is reasonably flat and balanced and we are both hiking pretty hard. By easing the jib, we have opened the slot and allowed the main to be trimmed in again slightly so the sails remain balanced. Get yourself some marks on the deck to observe just how much jib is out. We used the foot of the jib as the mark position - when looking for height in less wind we were sheeting the mid foot of the jib to about 3 inches from the deck edge, in the gusts we were happy to have that mid foot position 2 inches beyond the deck edge. You can see in this short video that we came round the mark - experienced a large gust which meant I had to flog the main - then Harry eased the jib, we held our course and then both sails were then slightly lifting - but we had more balance and speed. When the gust went, Harry re trimmed the jib for more power.
Thanks to Nigel Denchfiield for the use of his video clips. Try and teach yourself and your crew that the water is the safe place. We had some fun on Saturday practising water starts - well almost. Get the crew to ease the jib and then head up a bit - to simulate a large header - ask the crew to lean out harder and pull the jib in to help bear away and power the boat up. Both helm and crew can act as floats preventing the boat from coming over on top of them. The helm also pulls in the main sail and bears away. The result is both of you come out of the water with smiles on your faces and the boat resumes its normal direction. Once you have done this a few times you can start to realise that sailing the boat flat is easy - even healed to windward is possible - and that the crew gains confidence that they are in control of the balance of the boat. The result is that you can sail to windward rather than spend your time falling over - it tends to make the boat sail higher and faster. You can see this clearly in this video of Harry and I lapping the back of the Graduate Fleet.
Finally - watch this higher quality video of Harry easing the jib at mourn 1:20 - as the main was flogging - Harry had eased the jib to open the slot.
And remember that the boat sails with its sails - not the rudder - in strong winds this priority of concentration is a must, its what the original are all about. last but not least - Boat Trim on the Reaches -
It is mentioned many times - but when not plane-ing - sit forward - when you are, or about to plane - sit to the back of the boat, but keep an eye out for angry water which indicates that the transom is sinking - and you will need to sit forward again. I hope this helps you to enjoy stronger winds. Happy Sailing


