


 Select Store
 US
US
 UK
UK
Boat Maintenance Tips

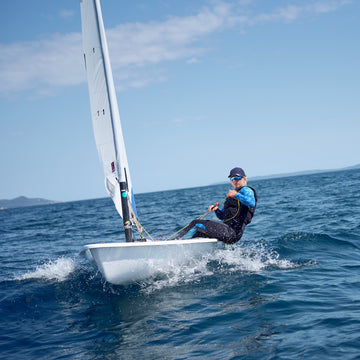
Your First Big Championship Checklist
There's something truly special about a sailing championship. It's more than just a regatta; it's an opportunity to challenge yourself, explore a new venue, and become part of a community that shares your passion for sailing. Whether you’re fizzing with excitement or feeling super nervous, good preparation can make all the difference.
This guide has been put together to help you arrive prepared, confident, and ready to make the most of every moment. The better prepared you are, the more you'll be able to focus on what really matters – enjoying the experience, learning from every race, and creating memories that you'll look back on for years to come.
Give your boat a thorough MOT
We’ve pulled together this basic list below; it’s not an exhaustive list, and it’s not class specific, but it’s a fantastic place to start. You’ve been training hard all winter, so it’s time to get your boat back on point for its Championship showcase.
If you discover an issue and aren't sure how to fix it, don't panic. Your Class Association community is often the best place to start. Class sailors and coaches have a wealth of experience and can usually offer practical advice or point you towards the manufacturer or class-approved hacks.
The Team at Rooster are always on hand to help, and true to our heritage, the team love nothing more than bimbling with boats and looking for those small wins to allow you to be in your element. Whether you need advice on maintenance, replacement parts, or essential spares, get in touch; we'd be delighted to help you arrive at the championship feeling ready to perform at your best!
Category
Subcategory
Check Item
Hull
Structure
Give the hull a good once-over and look out for any cracks.
Hull
Structure
Check the mast step for cracks or anything that doesn't look quite right.
Hull
Structure
Look for scratches, cracks or peeling grip around the centreboard case.
Hull
Finish
Tidy up any chips and scratches before they get worse.
Hull
Finish
Make sure the self bailer opens and closes smoothly and isn't full of grit.
Hull
Finish
Check your bung is in good condition and throw a spare in the toolbox.
Spars
Mast
Sight up the mast and make sure it's nice and straight.
Spars
Mast
Check fittings and rivets for corrosion, movement or wear.
Spars
Mast
Make sure all mast sections fit together snugly.
Spars
Boom
Check fittings and rivets are secure and corrosion-free.
Sail
Panels
Hold the sail up to the light and look for holes, tears or thin patches.
Sail
Stitching
Check seams are intact and not starting to pull apart.
Sail
Battens
Make sure battens are undamaged and seated properly.
Rigging
Halyard(s)
Look for worn spots, fraying or damaged rope.
Rigging
Mainsheet
Check for wear and any sections that feel tired.
Rigging
Jib Sheet
Make sure it's running smoothly and isn't showing signs of wear.
Rigging
Spinnaker Sheet
Make sure it's running smoothly and isn't showing signs of wear.
Rigging
Controls
Check the kicker is working smoothly and still bites.
Rigging
Controls
Make sure the outhaul runs freely and holds tension.
Rigging
Controls
Check the downhaul isn't worn and can be adjusted easily.
Rigging
Controls
Make sure the traveller isn’t wearing through.
Rigging
Painter
Check for wear and confirm it complies with class rules.
Rigging
Clew Strap
If the velcro is slipping, it's time for a replacement.
Rigging
Blocks
Spin every block and make sure ratchets still sound and feel healthy.
Centreboard
Foil
Check the leading edge for chips, dings or rough spots.
Centreboard
Foil
Make sure the trailing edge is smooth and undamaged.
Centreboard
Case
The board should go up and down smoothly without sticking.
Centreboard
Elastic
Make sure the elastic still has enough life to do its job.
Rudder
Blade
Check for damage, chips or rough areas.
Rudder
Stock
Make sure all fittings are secure and in good condition.
Rudder
Tiller
Look for cracks or sun damage in the universal joint – they often fail without warning.
Toe Straps
Webbing
Check for wear where straps rub and inspect all fixings.
Toe Straps
Elastic
Make sure the straps still spring back into position.
Fasteners
Hardware
Check screws are tight and haven't worked loose.
Fasteners
Hardware
Check bolts are secure and corrosion-free.
Fasteners
Hardware
Fresh tape always looks smarter and makes spotting problems easier.
Buoyancy
Hatches
Check seals are clean and keeping water where it belongs.
Buoyancy
Buoyancy Bags
Inflate them and make sure they're holding air properly.
Buoyancy
Leak Test
A bubble test can uncover leaks before they become a headache.
Trolley
Frame
Look for rust, corrosion or signs of fatigue.
Trolley
Wheels
Check tyres are inflated and ready for a long walk to the slipway.
Trailer
Bearings
Give them a check now rather than on the hard shoulder later.
Trailer
Lights
Test everything before setting off.
Trailer
Straps
Make sure straps are in good condition and still doing their job.
Measurement
Class Rules
Double-check sail numbers are correct and clearly visible.
Measurement
Class Rules
Make sure all required equipment is onboard and class legal.
Get the right gear
The right kit really makes all the difference on the water, and the beauty of European weather means you can launch in a sublime summer's day and be chewing through a hail storm as the four minute gun goes for the start of race three. Staying warm, protected, and comfortable means you can focus on performance — and staying out for longer.
We’ve tried to take all the faff out of packing your kit bag and created these handy what to wear guides, from Juniors through to trapezing, there’s something for everyone
Pack the opposite kit in your dry bag in your boat; if you’ve launched in glorious sunshine, make sure you’ve got a lightweight spray top and beanie you can pop on if that sea breeze kicks in or you have an accidental capsize. On the flip side, if you launch in a cosy Aquafleece, make sure you can pull it off in between races, if that sunshine does show its face. Top it off with a cap, with an epic pair of sunglasses and a slathering of suncream.
It can be really tempting to pop all your spares in a support rib, but it’s not always possible to find them in between races, even with the most attentive crew. So, keep those essential bits of kit and fuel close in a little dry bag in your boat, so you’re not caught short! Hangry and freezing is not the way to spend a day.
Don’t forget on shore too; changing rooms at big championships can be manic. Write your name on every single bit of kit you own and consider al fresco changing alternatives, like a quick dry poncho and a changing mat if you’re not a fan of the crowds.
Spares
After you’ve read this blog, your boat will be MOT’d and bimbled to perfection before your regatta, but breakages do happen, even to the most prepared sailors. Either tucked in your buoyancy aid, or safely stowed in your boat, we’d suggest always having these two secret weapons.
Small Carbine Hook – Shackle gone? Bosh clip it back on.
Rope that is 1.5 metres long, around 3/4mm - tie something back together, it won’t be pretty, but it will get you round.
Breakages are great challenges to overcome, but it’s good to practice them in a low stress environment. What would you do if your mast webbing strap failed on your topper? Or if your kicker clip blew up on your RS Tera? Have a go on shore, and then on the water, testing how you could bodge a fix, it could save you a big point discard or even better, you could help a friend on the water.
Fuel
Eating and drinking the right things before, during and after racing will help you stay focused, make better decisions, and maintain your energy throughout the duration of the regatta.
Before heading afloat, aim to eat a balanced meal containing slow-release carbohydrates such as porridge, wholegrain toast, cereal, or pasta. These foods provide a steady source of energy that will last longer than sugary snacks.
Hydration is equally important and an easy to sip on the go bottle is essential. Start drinking water as soon as you wake up and continue throughout your morning preparations at your accommodation and in the boat park. Even on cooler days, it's easy to become dehydrated without realising it, which can affect concentration and performance. A very simple rule of thumb is that you should be drinking approximately 1 litre for every race you do. This isn’t foolproof, so please adapt it for your needs and the conditions on the day.
For longer days, pack simple snacks that are easy to eat between races. Bananas, flapjacks, cereal bars, dried fruit, wraps or a sandwich are all great choices. These provide quick energy without causing a sugar crash. Try to avoid relying completely on sweets, chocolate and energy drinks. While they may give a short burst of energy, they can leave you feeling tired later in the day. With everything in life, there’s a balance to be found, make sure you’re excited to tuck into something tasty between races.
Remember: good sailors look after their boats, but great sailors also look after themselves. Fuel your body well, and you'll give yourself the best chance of performing at your best on the water.
Relish the detail by doing your homework
One of the easiest ways to gain confidence before your first championship is to arrive as prepared as possible. Long before you launch your boat, there is a huge amount of information available online that can help you understand the event and venue. Start by reading the Notice of Race and Sailing Instructions so you know the format, schedule, and key rules. Watch any competitor briefings if they are available and take note of local advice.
Explore the venue on Google Maps to familiarise yourself with launching areas, race courses, parking, and facilities. Check out the club and class websites to learn more about the venue, local conditions, and previous events. You can even use Google or ChatGPT to research typical weather patterns, tides, currents, and sailing tips for the area. Did you know we have some of our own venue guides by the legendary Steve Cockerill and our fantastic Rooster Riders? If you’re heading to the UK this season, to either Weymouth, Largs or Pwllheli, you’re in luck! The more you know before you arrive, the less there is to think about when racing starts.
Good preparation won't guarantee results, but it will help you feel confident, organised, and ready to make the most of your championship experience.
Set goals that you can control
Attending your first championship is exciting, but it's important to remember that success isn't just about where you finish. Rather than focusing on winning, set yourself SMART goals; goals that are Specific, Measurable, Achievable, Relevant, and Time-bound. For example, you might aim to get a front row start in at least three races, change your settings on every leg of the course, or not to be the outside boat at every mark rounding.
These are things that are within your control and can be measured throughout the event. By focusing on personal performance goals rather than results, you'll gain confidence, learn more from the experience, and finish the championship with a real sense of achievement, regardless of your overall placing.
And finally
Above all, have fun. Throw yourself into the experience, make some new sailing mates, and try to enjoy every minute both on and off the water. There will be plenty to learn, plenty to laugh about, and hopefully a few adventures along the way. Sail your best, embrace the challenge, and make some awesome memories you'll be talking about for years to come.
Mark's Guide: 7 Essential Tips and Checks for Winter Dinghy Maintenance
Extract from book, to be the published "Maintenance and Recommissioning of Racing Dinghies”
1. Storage
Wooden Boats. There is only one place for an all wood or composite racing dinghy to be stored, and that is undercover in a dry storage garage, workshop or shed. Even with modern varnishes (1 and 2 pot) and epoxy coatings, there is still a chance for water, ice & frost to penetrate the surface & joints and damage the wood. Expensive to repair once damaged, and water damage often ends up being painted over due to discoloration.
Plastic boats. All glass and FRP boats will survive the UK winter climate outside but invest in a good breathable cover with a deep skirt as seen in the photo 1 - on a Solo dinghy. It will also prevent UV fading of the gelcoat as seen on this blue 2000 - See photo 2 below.
Photo 1
Photo 2 - Shows typical UV fading if left unprotected, the gelcoat is slowly degraded by UV radiation causing the surface to become yellowy / white and powdery as the gelcoat is oxidized. – Can be expensive to correct.
Also, I have seen ILCA/Lasers hulls that have been dry stored (and with non-breathable PVC covers - both with top and undercovers) being stored inside with damp or wet surfaces and can suffer over time from osmosis.
Make sure the carpet or protection used on the trolley cradle is dry before storing, as this will hold water and damage the hull (both wood and plastic hulls) surface over time.
2. Sail Care
Remove the sails from your boat. Boats both stored outside and inside are a target for rodents to hibernate in and eat your sails and sail bags. The damage can be extensive.
Give them a thorough rinse with fresh water from a hose. I hang mine up to dry on the washing line (use the mainsheet rope) and then store indoors/garage/workshop. Check for any damage around the batten pockets and headboard/luff rope area and get any repairs at your local sailmaker.
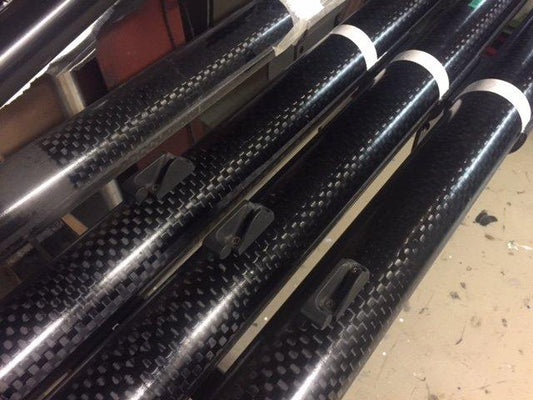
3. Spars
Remove the spars from your boat, wash, dry down and then dry store if possible. Galvanic corrosion (see below photo 3 example of a RS400 s/s block mounted on the boom) can occur between the stainless-steel fittings and your aluminium mast. Note: Carbon fibre masts will not suffer from galvanic corrosion but metals in electric contact (and the presence of an electrolyte such as salt water) with carbon can cause issues.
Photo 3 - Above (red arrow) shows typical galvanic corrosion that occur between the stainless-steel fittings and your aluminium spar.
If you find an issue, then remove the stainless fitting, and clean the area behind them thoroughly. Bed the fittings down with Duralac paste applied to the entire surface when putting them back, taking care that there are no voids between fitting and mast wall where water can get in and stand. Duralac also provides corrosion protection. Also, add a smear Durlac on the screws or rivets when affixing the fitting.
Duralac paste (photo 4) is a chromate containing jointing compound designed to inhibit electrolytic decomposition between dissimilar metals – often called galvanic corrosion. It is a single pack, air setting product. Used correctly, Duralac prevents anodic decomposition.
Photo 4
4. Hull Upkeep
Wash and polish the hull. Many sailing areas around the coast suffer from the issue of sewage discharge into the sea and harbours. This is especially noticeable on the light breeze days, when a light brown scum line can be seen on the waterline of your dinghy.
Wash down every time you exit the water and sponge off the hull. The discharge is stubborn to remove and will stain especially FRP/Glass boats as seen in photo 5 and can be difficult to remove without a good deal elbow grease and a product like the Facecla G3 Fine Finishing Compound to remove the staining. Finish off with a good quality polish such as the McLube polish.
Photo 5 – Pollution staining
5. Ropes and control lines
Remove and wash the control lines and sheets (remove all non-continuous control lines). You can put the control lines in a bucket of warm water with a mild detergent to soak. The mainsheet, jib and kite sheets in a pillowcase, tie off the opening and put in a washing machine on a cool temp wash with some suitable conditioner. When the cycle is complete remove from the machine and allow to dry off before storage.
6. Security
If the boat is stored - especially in the winter months in the local dinghy compound or park, make sure that the boat is tied down well, the cover is undamaged and that the securing clips are locked in place and tightened. It is important to check that your insurance covers you for winter outdoor storage. Make you own ground concrete tie down anchorage fixings if needed. (Photo 6)
Photo 6 - Build your own concrete tie downs - if permissible by your club.
Use wheel clamps & hitch locks, plus padlocks and chain (photo 7) for added security.
Photo 7 - A substantial wheel clamp and padlock.
7. Maintenance
Deck fittings
I recommend slightly loosening off the tops off your cam cleats and giving them a thorough clean with mild detergent and fresh water. When dry, apply a dab of Harken McLube OneDrop Ball Bearing Conditioner. Do not use grease or oil as this will attract salt particles next season. Damaged cam springs can be replaced, and you may need new cams/cleats if you have signs of wear on the cam teeth. Ball bearing mainsheet block systems and traveller cars need particular attention, flush through with fresh water. It’s a good time to check traveller cars are running freely and replace if necessary. Check all rudder fitting both for galvanic corrosion between the alloy fitting and the screws/bolts. Check for tightness of all fixings.
Toestraps
One the most used items on the boat and take considerable amount of stress and strain during the season. They generally start to wear at the edges, around the pressed in eyelets and the mounting points (if they are screwed down via the gripper plates) check the fixing points and tighten any screws and replace any adjustment ropes as necessary toestraps should be given a good clean and thoroughly washed with freshwater. Toestraps are easily replaced and are relatively inexpensive and can smarted up an otherwise tatty hull. Check your gripper plate screws for tightness as seen in photo 8.
Photo 8 - A typical toestrap gripper plate.
Foils.
Rudder and daggerboards/centreboards are easy to work on indoors. Check the leading and trailing edges for signs of damage before storing away. Any gelcoat work should be done at this time in a warm (indoor) environment.
Bailers leaking?
Now is the time to replace those internal rubber seals with a service kit. Otherwise, if not leaking, then just putting the bailer down and then smearing a small amount of Vaseline along the sides and back of the wedge that protrudes below the boat to keep it in good shape. Then put the bailer up and wipe off any excess.
Trailers and Trolleys.
Trailers: Grease the bearings (or replace the entire hub if corroded (photo 9) or you have worn bearings - and they become noisy or stiff when rotated). Locate the grease fitting—it is the nipple (photo 10 - see the red arrow) that fits into the female end of a grease gun. Squeeze grease from the gun until bearings are well lubricated (but not too full).
Photo 9 - A trailer wheel & hub in poor condition.
Photo 10 - Location of the hub grease nipple.
'Milky grease' in the bearing is a sign that it has been compromised by water. If this happens, repack all bearings or replace. Lubricate your wheel nuts. Doing so will help you to loosen them when changing wheels. This is especially important if you are fixing a flat by the side of the road. Wheel nuts tend to rust easily. Use Copper Ease grease to lubricate the threads to stop them seizing. Check your tyre pressures. Check the tyre sidewall (also for sidewall perishing) for the correct pressure and ensure the tread depth is not below the legal limit. 1.6mm is the legal minimum tyre tread depth for all vehicle tyres, including trailers, a minimum of 3mm is recommended, as this ensures the safest driving - and towing - experience across all road and weather conditions. Below this level, handling can be compromised.
Trolleys
Check you glass fibre cradle(s) for cracks or damaged, and repair. Replace the any damaged foam covering or use the Astro Turf matting – (See photo 11). Get any metal/welding repairs done now rather than in the middle of the sailing season. Repairs will almost always be cheaper than the cost of a new trolley. Consider replacing your pneumatic wheels with puncture proof wheels/tyres if your boat is launched from a hard surface. (Not recommended for sandy foreshores).
Photo 11 - Astro Turf matting.
Astro Turf matting (photo 11) as used on the trolley cradle. Reduces water retention and possible scratching of the hull from any grit and sand held on the cradle. Consider a set of puncture proof wheels as seen in photo 12 - ideal for launching from hard surfaces.
Photo 12 – A puncture proof trolley wheel
Photo 13 - A wide 'beach wheel' used on for launching on sandy and soft launching areas.
If you leave you boat outside, use a decent prop, so if any water that does get in - it can drain out. -Photo 14
Photo 14 - Use a prop to support your dinghy.
Final bit of advice!
Investing time now to prepare your dinghy for winter will pay dividends when the warmer weather comes around, enabling you to get sailing quickly again without any fuss. You will also have helped to protect your investment for the longer term.
Europe Halyard Solutions
I started this project wondering how to make a reliable Halyard using Rooster's Zero (UMHwPE heat treated and solution dyed) equivalent to some of the best Dyneema® on the market.
Luckily I had some expert help from Derek Clark who was happy to share some of his work for the RYA, and together we tested and made a solution for the Europe. I have had one on my boat since March 2021, sailed in lots of breeze over the season in my bid to win the UK Europe National Championships just 25 years since my last title. On inspection the excellent stainless bead has only polished the Zero that takes the strain and offers me a very lightweight custom solution at the same time. It's easy to make a quick adjustment to maximise the height of the headboard as well. Check out the video below - I hope you find it instructive.
The video pretty much spells out how to make the halyard. The kit is available from our EU Store here.
A nice lightweight 2mm halyard line (reduces windage) is available here.
Also used in the video are Rooster Serrated Scissors.
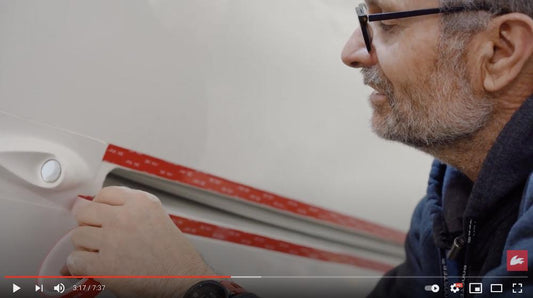
How to Change your Mylar Slot Gasket with 3M Tape
We did it... I was inspired to track down the tape that was used to win the 470 gold at the Olympics. We ended up working closely with 3M to find this solution. Its been on my boat now for 12 months and is super easy to fit and durable. Check out the latest Blog post below. Now available from Rooster in 10mm width rolls and 19mm width rolls for Mylar Slot Gaskets.

Need a Premier Hull Finish? - Use SpeedSIX HydraPRO
Field application of SpeedSIX HydraPRO
SpeedSIX HydraPRO comes if two handy sizes either a 100ml tin (enough for most dinghies) or a 500ml version (suggested for keelboats). The product comes in a quality aluminium screw-top container (the 100ml on test here) which is suitable to cover most dinghy hulls. The boat in question to have the product applied was an FRP Solo (LOA 3.78m). First job before applying the product, is to ensure that the hull is completely clean, degreased and any residue, dirt or grime is removed.
Fig 1 Photo of hull before cleaning. To assist with the clean up, I used a bike product called ‘Muc-off’ (a pink cleaner that is biodegradable, free from acids, CFC’s and solvents etc), and this was sprayed on and then washed off with clean water and a sponge. The hull was then completely dried using a microfiber towel.
Fig 2 Initial cleaning and drying of the hull. It must be remembered that SpeedSIX HydraPRO will not remove scratches or imperfections in the hulls surface. SpeedSIX HydraPRO is not abrasive, it is simply a top/final coating applied to reduce friction between the hull and the water surface. For best results, it is therefore recommended that the hull is in good condition and any work to remove scratches, marks, dents etc is done beforehand.
It is suggested that a product such as G3 is used to remove any small scratches or imperfections beforehand, and then cleaned and polished accordingly
Fig 3 Use a clean, dry cotton cloth with SpeedSIX HydraPRO. The day of application was quite an overcast day with an air temperature approx. 12°C and dry. It is suggested that you wear a quality pair of Latex gloves when using any cleaning or polishing product. Shake the container well. The SpeedSIX HydraPRO product is very thin and has an interesting smell! Use a dry clean cotton cloth (lint free) to apply the product in a circular motion. Apply to a small area at a time. A small amount of the liquid goes a long way - you don’t need to use a lot of it, in fact, the 100ml tin would easily cover a Solo, RS Aero, Laser or similar size dinghy, and you would have some left over for the foils etc. Allow the applied coating to dry. As it was a particularly cold day I left the product to dry for about 15-20 mins and then, used another new cotton cloth to polish the dry residue. The result was a good clear, glossy, shiny hull.
Fig 4 The final polished hull & centreboard The boat remained on each side for at least 2 hours before putting back onto its trolley. It was noticeably ‘slippery’ on the cradle when putting it onto the trolley and when slightly moving it around. As a further long-term test, I applied SpeedSIX HydraPRO to a small area on the transom of a small keelboat, in particular, on the waterline area. Keelboats that are kept on some estuary moorings tend to get a brown ‘stain line’ just above the waterline and can be quite difficult to remove at the end of the season. I applied a small amount of SpeedSIX HydraPRO to the waterline area, and it will be interesting to see if this reduces any future staining.
Fig 5 SpeedSIX HydraPRO was applied to the waterline area of a keelboat In conclusion, the product is good value, and a little of the liquid goes a long way. It gives a good glossy finish, very easy to apply and to remove any surface residue left. It is quite a thin liquid and should be applied sparingly to your hull. Remember, it does not remove scratches, imperfections or would not rejuvenate a faded gelcoat surface. Any such remedial work would have to be done before applying the SpeedSIX HydraPRO product.

Ronstan Orbit Lashing Blocks and Attachment Methods
Ronstan’s latest range of small 20 and 30 mm diameter Orbit blocks are designed to be used on dinghies and keelboats and are versatile enough to be used in most applications where strength, weight and friction-free running are important. The design of the range is based on modern ropes to secure with the elimination of heavy rigid shackles.
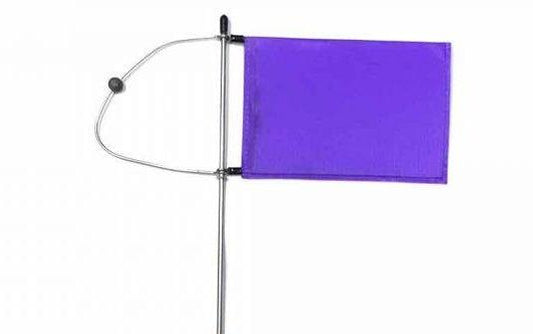
Competition Entry #1: Keep Your Burgee On
I sail at Combs Sailing Club in the Peak District. It's a reservoir surrounded by hills so gusty winds and capsizes are inevitable. I got fed up with righting the boat and finding the burgee staff with no burgee on it.....
Varnishing a carbon mast
I'm now of an age where my memory isn't quite what it once was. At work, I have become highly skilled in feigning a detailed understanding of problems whilst frantically attempting to recall them from memory (it's working, they haven't found me out yet!). And when I came to revarnish my mast last weekend it was apparent that I could not recall the process that gave a glass finish last year. So I thought I'd write a quick article about it as an aide memoire for me next year, and also for anyone else looking at the task.
I should point out, I have tendency for perfectionism that is both a strength and an Achilles heel, and find anything less than a glass finish difficult to accept. So the attached instructions may be a little OTT, but perhaps a good start point.
A good quality marine polyurethane varnish (I use Blakes Duragloss)
Thinners for the varnish.
The best 2" paint brush that you are prepared to buy. If you are at the 'I can't believe that a brush can cost so much' type pricing, that's about right.
Some dust free containers to mix your varnish (jam jars etc)
Good quality masking tape, again the money seems excessive but it is ultimately worth it.
Lots of wet and dry sandpaper from 240 grit to 600 or 800 grit. And a bucket and sponge
You also need to hang your spar level, and be able to access the full length of the spar. A set up that allows you to easily turn the spar to varnish is useful:
If the existing varnish is not too bad, sand back using 240 grit wet and dry. Take care not to sand back into the fibres of the spar, but be sure to remove all the imperfections and dings that have blighted your spar over the past year. Keep working until you think the preparation is as close to perfect as possible- any defects left at this point just mean more work later. If you are worried about minor 240-grit scratches showing through your varnish, work up through wet and dry grades to 600/800, but again be careful not to sand into the spar.
Wash the spar several times with water, until you are confident that it is perfectly clean. Mask fittings etc with your good quality masking tape. Wipe the mast with a tack cloth. Wipe the mast with a cloth moistened with thinners immediately prior to varnishing to get rid of any final traces of dust and 'activate' any old varnish.
Wait for the following conditions: 15 degrees C (ish), spar not hot to the touch, preferably no direct sunlight, dry conditions for at least 6 hours (no rain or dew), no wind. Apply a coat of varnish. Irrespective of directions on the tin, I always thin the varnish by 5-15% so that it flows nicely, and go for thin coats.
Read the overcoating instructions on the tin, and apply a further coat before the 'max overcoating' time.
Stand back from the mast, and start worrying about where all those varnishing defects have come from. Flat back the varnish - if your preparation was near perfect first time round you might be able to flat back with 600 grit, if not you may need coarser grits.
You are looking to get to a point where the whole mast is coated with flatted-back varnish, no runs or other defects. If you are not at this point go to (2) and try again. May take several iterations.
Time to apply the final top coat. Get obsessive about the conditions outlined in (3). Get everything as clean as possible, accept no defects. Be sure to thin your varnish.
Just after the final coat is applied, turn the spar through 90 degrees every minute or so, whilst the solvents flash off. This helps to stop runs forming and makes it easier for the varnish to flow. .
Decide whether the finish is good enough, and repeat steps above as necessary.
The whole process takes me 4 hours or so, but that's on a spar that is regularly maintained. As soon as this gets down to our club it will be surrounded by 400 and Laser sailors all looking to find little defects, but I shall rise above it!


