A simple guide to fixing typical damage on leading and trailing edges on dinghy foils. - Write up by Abi Bentley
Having never fixed a chipped rudder dinghy blade tip, Roosters Mark Harper (who has built many high-performance dinghy foils in the past) showed me a very simple method of using the handy size WEST SYSTEM Six10 Epoxy to repair such damage.
Below is the damage to an RS200 rudder blade causing a rather nasty chip on the rudder tip. This sort of damage is very typical of a dinghy foil. 

I am informed by Mark, to affect a good repair, you have to assess if the amount of damage, to see if it warrants some sort additional reinforcement to strengthen the area in question. The size of the damage (approx. 15mm) is just about on the limit for a non-reinforced repair (i.e. adding any extra veneer pins and / or fabric cloth material reinforcement).
The first step was to generally clean the blade itself and make sure it is clean and dry. No slightly damp salty parts - otherwise the epoxy will not bond.
Below image shows all the materials and tools needed to effect a repair.

Next is to tape off around the area, here we have used reinforced glass tape, but masking tape is also okay. Using a metal file make several channels across the area. On this rudder blade there was a crack above the missing casing so we filed directly on top of this.
This seemed a scary step for me, but Mark assured me that without a significant ‘key’ the epoxy will not adhere to the surface correctly. So do not be shy in making a significant grooves on the surface.


Once you are happy with the grooves you have made, you will need to sand down the area, 120 Grit waterproof paper should be used here. If there are any lose parts of the existing glass fibre matte it is best to sand this down as this is no longer structurally sound. The next step is to clean thoroughly the now sanded area with Acetone solvent.
The WEST SYSTEM ® Six10 Epoxy - It consists of two parts which once mixed together you usually have around 40 minutes to work with until it start to cure.
The WEST SYSTEM® Six10 cartridge is comprised of the cartridge body, removable nose plug and a threaded retaining nut. A 600 static mixer is included with the cartridge. (It’s called a static mixer because it has no moving parts.) The cartridge fits into any standard sealant gun—manual, cordless or pneumatic—and allows simultaneous dispensing and mixing of the two-part epoxy. You have to throw it away after use but you can purchase spare 610 spare mixer nozzles.
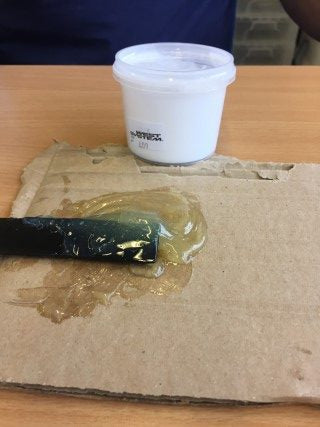
Here we just squeezed the epoxy straight from the tube and mixed on a scrap piece of cardboard with a West System Reusable Mixing Stick, it is a good idea to use gloves for this step.

Relatively small quantities added to a resin mix will give non-sag properties so the epoxy does not run away. The inclusion of colloidal silica has the effect of increasing the hardness of the resulting mix which will create more difficulty when sanding. If you want to add a colour to your epoxy to match the colour of the foil add this now. You might like to use white pigment - here we have not used a colour pigment.


80 grade paper can now be used to initially shape the epoxy repair. A small 50mm sanding pad can be used to give a smooth and level finish, using various grades of sanding disks from 120 grade to 200. Wet and dry grade 400 to 800 was used to finish off.


I hope this helps you on your future epoxy quests!


 Select Store
 US
US
 UK
UK
